Detailed Introduction to Computer Bus and its Functions

What is a Computer Bus?

A computer bus is a common pathway through which information is connected from one component to another. Computers comprise many internal and external components. For these components to communicate with each other, a bus is used. This pathway is used for communication and can be established between two or more computer components.

In simple words, a computer bus is a set of parallel conductors, which may be conventional wires, copper tracks on a Printed Circuit Board, or microscopic aluminium trails on the surface of a silicon chip.

Picture Diagram of Computer Bus
Computer System Bus: Source

Topics Covered in this Computer Bus Session

  • What is a computer bus?
  • Functions of buses.
  • Types of buses.

Functions of Computer Bus

  1. Data sharing– buses are designed to transfer data between the computer and the peripherals connected to it. The data is transferred in parallel, which allows the exchange of 1, 2, 4 or even 8 bytes of data at a time. (A byte is a group of bits used to represent a character normally 8 bits.) Buses are classified on how many bits they can move at the same time, which means that we have 8-bit, 16-bit 32-bit or even 64-bit buses.
  2. Addressing– A bus has address lines, which match those of the processor. This allows data to be sent to or from specific memory locations.
  3. Power– A bus supplies power to various peripherals that are connected to it. This is unlike a disk drive that needs to be connected to the power supply unit.
  4. Timing– The bus provides a system clock signal to synchronize the peripherals attached to it with the rest of the system.

Types of Computer Bus

A modern-day computer system can be viewed as comprising just two types of buses. These are the System Bus and the I/O Bus or Expansion Bus.

System Bus

The system bus is a pathway composed of cables and connectors used to carry data between a computer microprocessor and the main memory. The bus combines the functions of a data bus to carry information an address bus to determine where it should be sent, and a control bus to determine its operation.

By combining the three functions, manufacturers were able to reduce costs and improve modularity. Other names of the system bus are the internal bus, internal data bus, memory bus, or Front-Side-Bus.

The design of the system bus varies from computer to computer. Sometimes depending on the manufacturer it can be specific to a particular computer design or may be based on an industry standard. Using the industry standard makes it easy to upgrade the computer using standard components such as the memory and IO devices from independent manufacturers.

The size of the system bus, also known as its width, determines how much data can be transferred at a time and indicates the number of available wires. A 32-bit bus, for example, refers to 32 parallel wires or connectors that can simultaneously transmit 32 bits. A bit (short for binary digit) is the smallest unit of data in a computer. It has a single binary value, either 0 or 1.

I/O Bus or Expansion Bus

Short for input/output (pronounced “eye-oh”). This is a bus made up of electronic pathways that connect the different external devices, such as a printer, storage, monitors, keyboard, mouse, etc.

Thus I/O bus connects various peripheral devices to the CPU – these are connected to the system bus via a ‘bridge’ implemented in the processor’s chipset. The term I/O is used to describe any program, operation or device that transfers data to or from a computer and to or from a peripheral device.

Every transfer is an output from one device and an input into another. Devices such as keyboards and mice are input-only devices while devices such as printers are output-only. A writable CD-ROM is both an input and an output device.

Other names for the I/O bus include expansion bus, external bus or host bus. An expansion bus typically comprises a series of slots on the motherboard into which cards are inserted. The common expansion bus types include:

Expansion Bus Types

  • ISA – Industry Standard Architecture
  • EISA – Extended Industry Standard Architecture
  • MCA – Micro Channel Architecture
  • VESA – Video Electronics Standards Association
  • PCI – Peripheral Component Interconnect
  • PCMCIA – Personal Computer Memory Card Industry Association  (Also called PC bus)
  • AGP – Accelerated Graphics Port
  • SCSI – Small Computer Systems Interface.
  • USB – Universal Serial Bus
  • FireWire

ISA Bus (Industry Standard Architecture)

This is the most common type of early expansion bus, which was designed for use in the original IBM PC.

The IBM PC-XT used an 8-bit bus design. This means that the data transfers take place in 8-bit chunks (i.e. one byte at a time) across the bus. The ISA bus ran at a clock speed of 4.77 MHz.

16-bit and one 8-bit ISA slots on a motherboard
Five 16-bit and one 8-bit ISA slots on a motherboard: Miha Ulanov

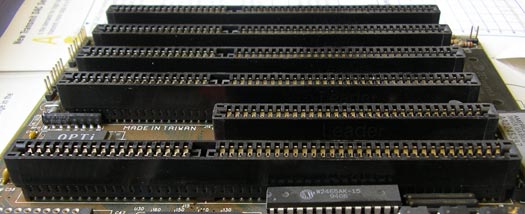
For the 80286-based IBM PC-AT, an improved bus design that could transfer 16 bits of data at a time was announced. The 16-bit version of the ISA bus is sometimes known as the AT bus. (AT-Advanced Technology)

The improved AT bus also provided a total of 24 address lines, which allowed 16MB of memory to be addressed. The AT bus was backwards compatible with its 8-bit predecessor and allowed 8-bit cards to be used in 16-bit expansion slots.

8-Bit ISA card (XT-Bus) 16-Bit ISA (AT –Bus  card)
8-bit data interface16-bit data interface
4.77 MHZ bus8-MHZ bus
62-pin connector62-pin connector
36-pin AT extension connection
Comparison between 8-bit ISA and 16-bit ISA Bus (XT Bus vs AT Bus)

Problems with the ISA Design

The ISA design endured the PC market for quite a while. However, it suffered from two major shortcomings. These are, lack of speed and compatibility problems arising from card design.

Plug and Play Specifications

In 1993 the IEEE (Institute of Electrical and Electronics Engineers) standardized the Plug and Play (PnP) specifications. Some ISA cards and ISA buses that support plug-and-play became available in the market.

The PnP system allows devices to automatically configure themselves.

MCA (Micro Channel Architecture) Computer Bus

This bus design was developed by IBM as a replacement for ISA when they designed the PS/2 PC which was launched in 1987.

The bus offered several technical improvements over the ISA bus. For instance, the MCA runs at a faster speed of 10MHz and can support either 16-bit or 32-bit data. It also supports bus mastering.

One advantage of MCA was that the plug-in cards were software configurable i.e. they required minimal intervention by the user when configuring. When a new expansion card was fitted and the PC powered up, it prompted the user to insert the machine’s reference diskette and the machine then automatically configured the new card’s resources and other parameters.

The MCA expansion bus did not support ISA cards and IBM decided to charge other manufacturers royalties for use of the technology. This made it unpopular and it is now obsolete technology.

MCA Computer Bus
Two 32-bit Micro Channel connectors and two 16-bit with Auxiliary Video Extension: Darklanlan

EISA (Extended Industry Standard Architecture)

EISA was developed by a group of manufacturers as an alternative to the MCA bus. It was designed to use a 32-bit data path and provided 32 address lines giving access to 4GB of memory. Like the MCA, EISA offered a disk-based setup for the cards, but it still ran at 8MHz for it to be compatible with ISA.

The EISA expansion slots are twice as deep as an ISA slot. If an ISA card is placed in an EISA slot it will use only the top row of connectors, whereas a full EISA card uses both rows.

EISA provided a much better performance than the ISA equivalent. Apart from being able to transfer 4 bytes of data simultaneously, it offers bus mastering; a technology that placed a mini-processor on each expansion card. These mini-processors controlled much of the transfer allowing the CPU to perform other tasks.

Computer Bus: Extended Industry Standard Architecture
Extended Industry Standard Architecture: Wikimedia Commons

VESA Bus (Video Electronics Standards Association)

It is also known as the Local bus or the VESA-Local bus. VESA was invented to solve the problem of proprietary technology where different manufacturers were attempting to develop their buses. It was developed with the main aim of providing enhanced video performance on computers. It was thus aimed at standardizing PC’s video specifications.

The VL Computer bus provided a 32-bit data path and run at 25 or 33MHZ. It ran at the same clock frequency as the host CPU. But this became a problem as processor speeds increased. The faster the peripherals are required to run, the more expensive they are to manufacture.

It was difficult to implement the VL-Bus on newer chips such as the 486s and the new Pentiums and so eventually the VL-Bus was superseded by PCI.

ISA Slots
Computer motherboard with 7 ISA slots of various feature levels. Six are 16-bit ISA (longer – with middle black sections), and three additionally have a VLB slot (leftmost brown sections): Source

Features of The VESA Local Bus Card

  • 32-bit interface
  • 62/36-pin connector
  • 90+20 pin VESA local bus extension
  • The VESA design was backwards compatible with the older ISA cards.

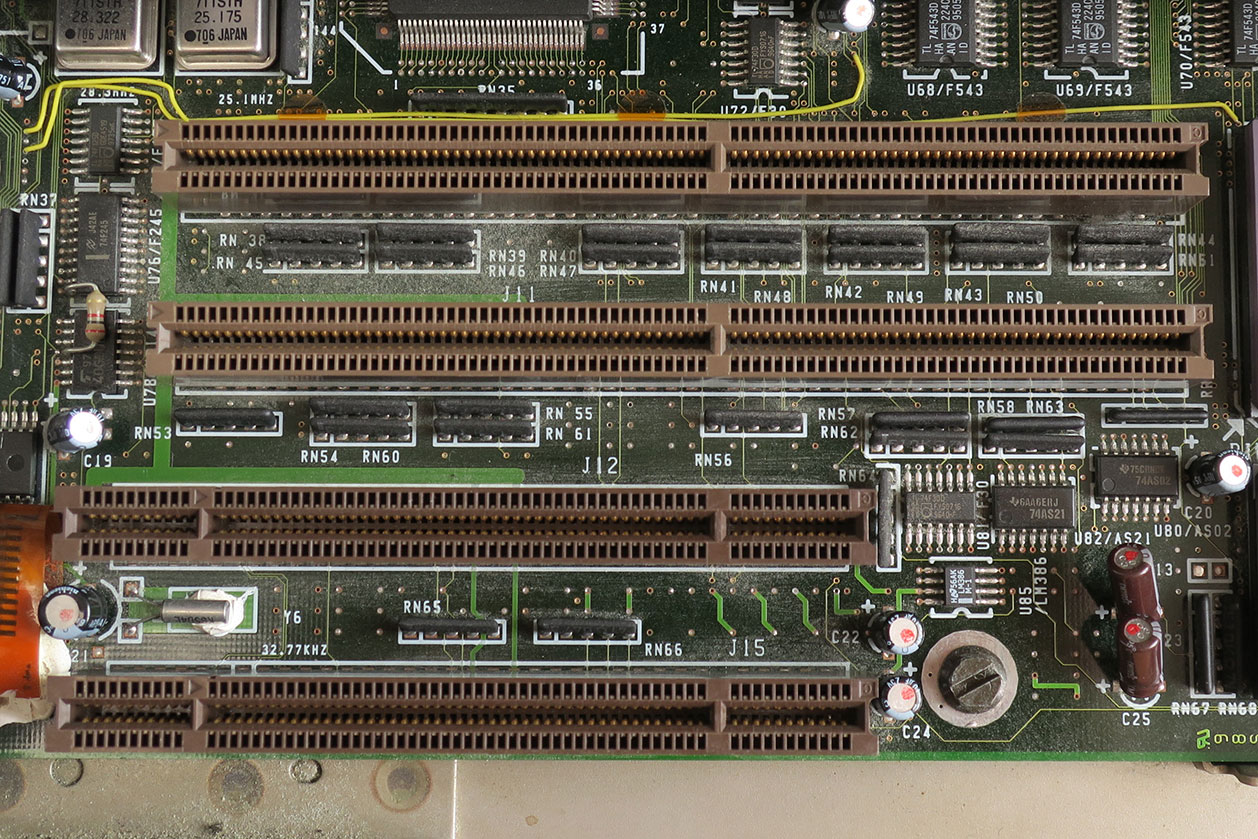
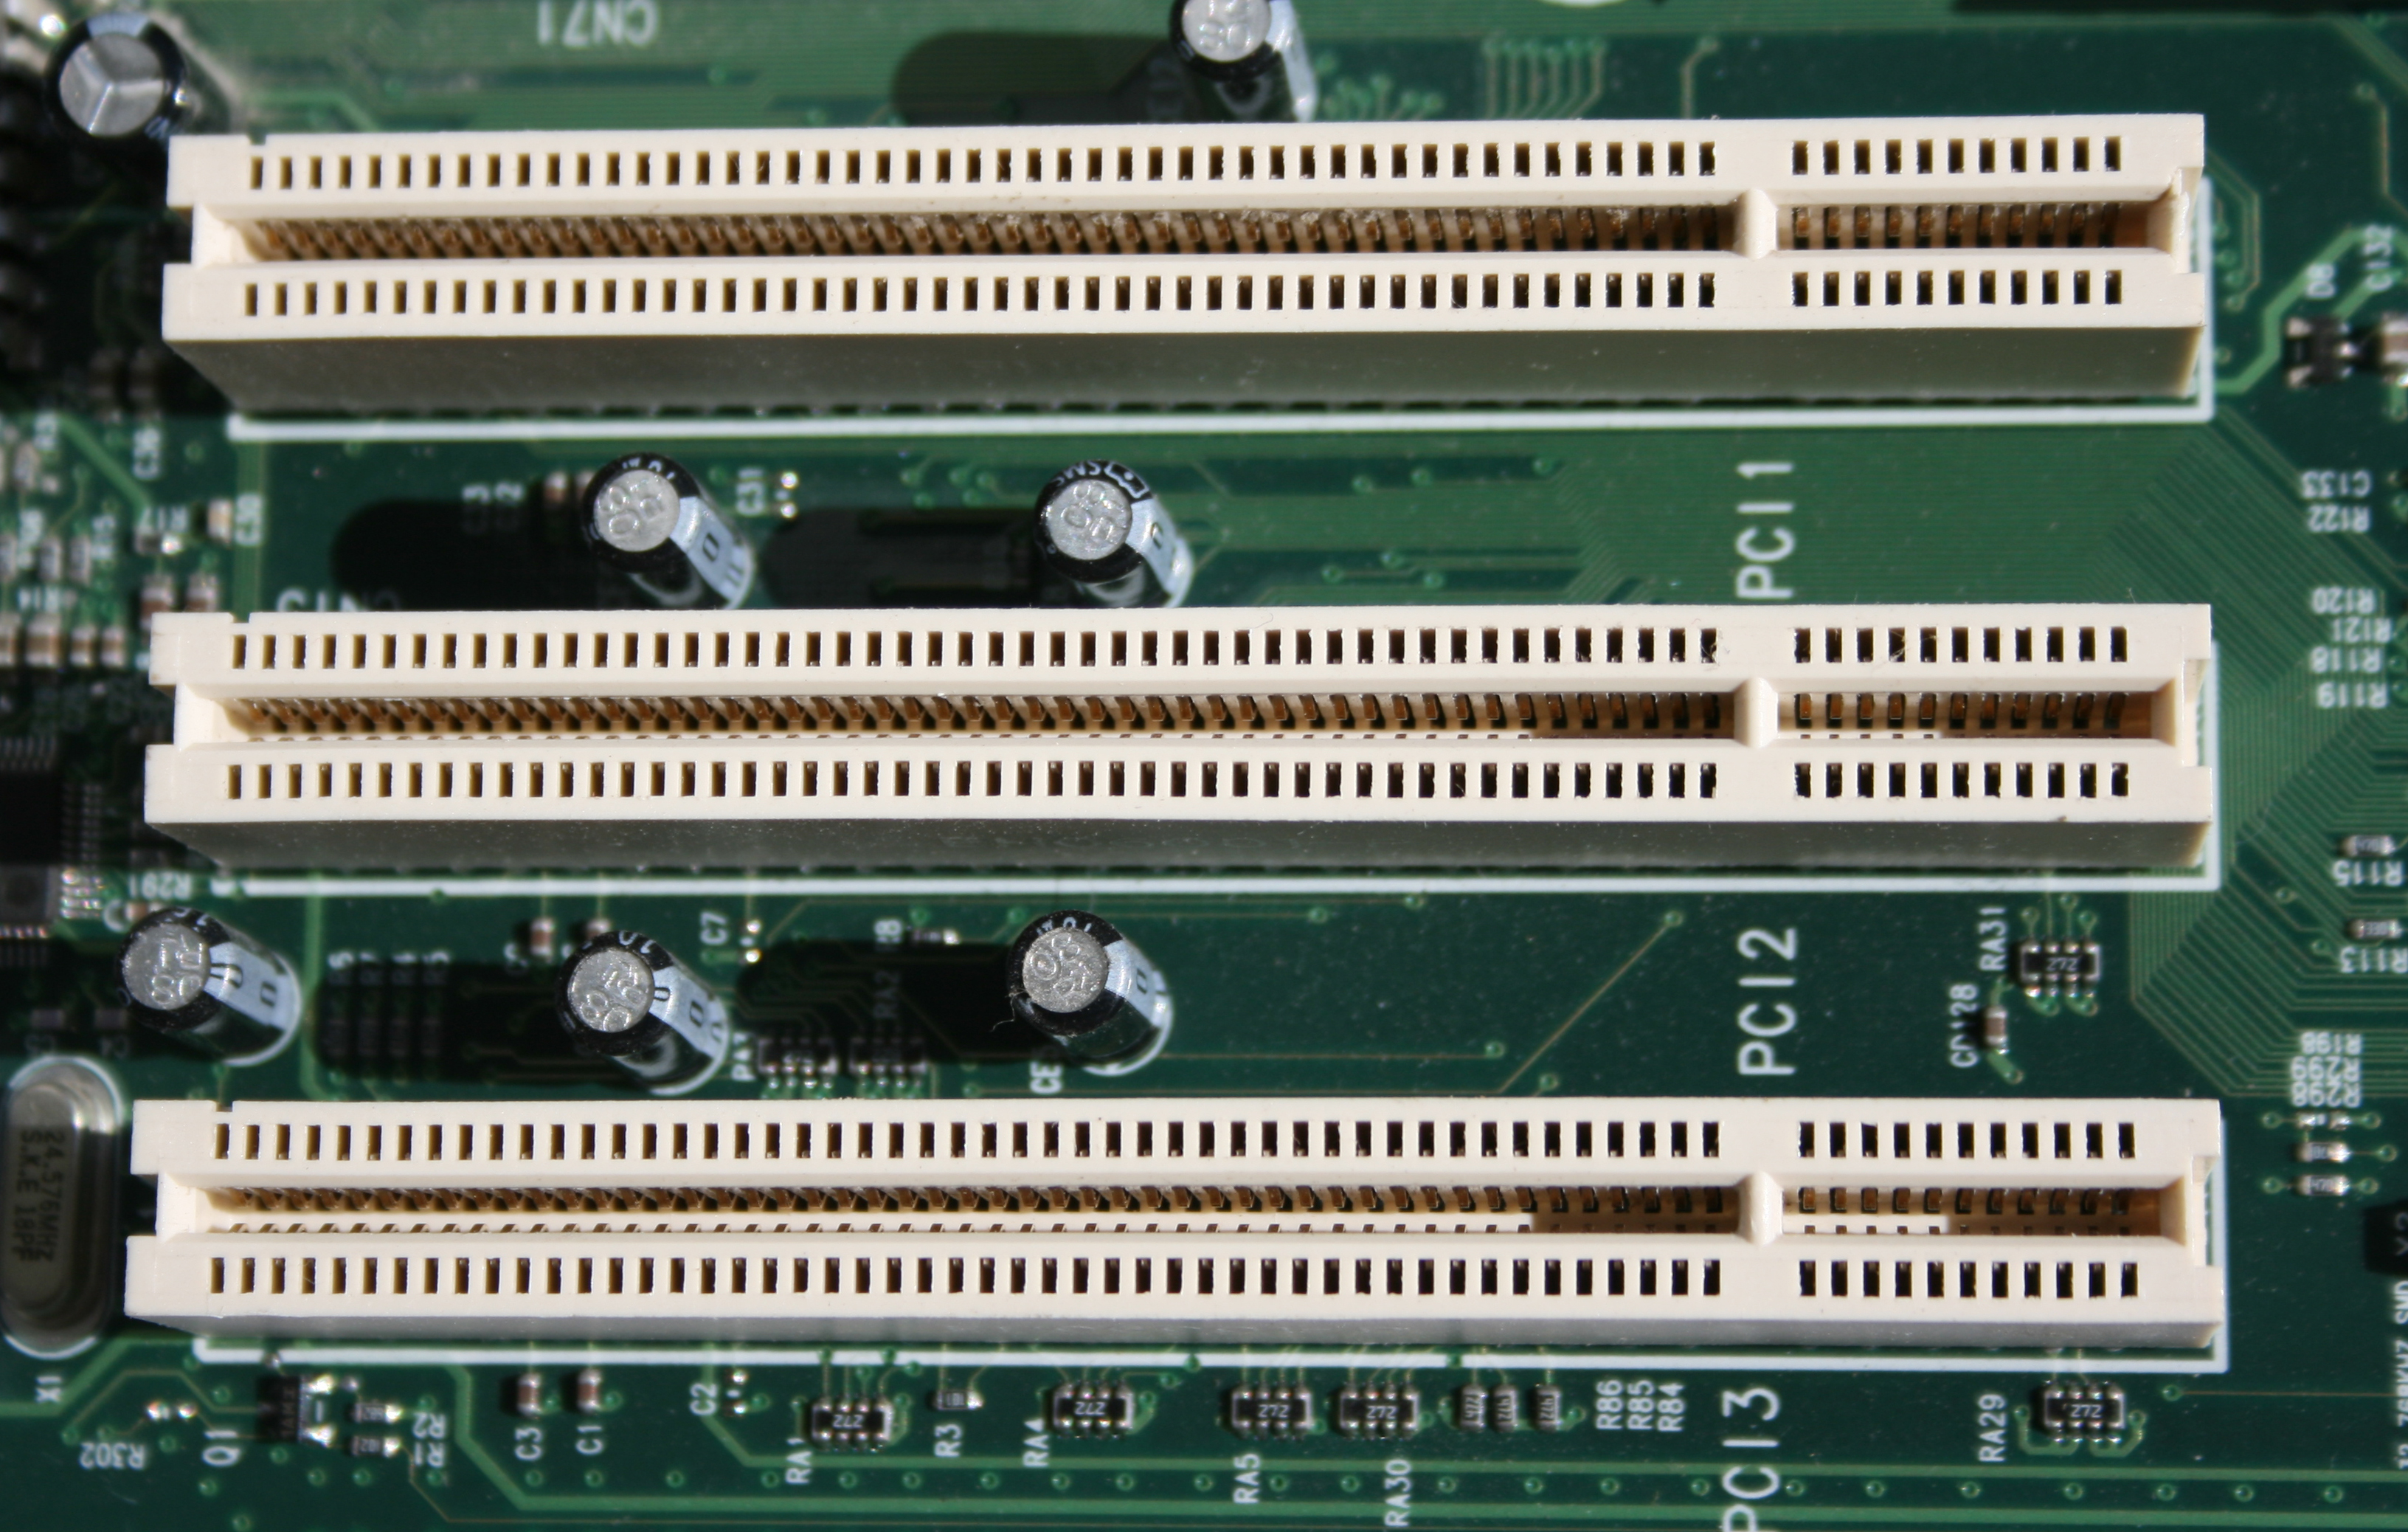
PCI (Peripheral Component Interconnect)

PCI brought about changes in the design of the bus and its communication with the processor bus. It was developed by Intel and launched as the expansion bus for the Pentium processor in 1993. It is a local bus like VESA meaning that it connects the CPU, memory, and peripherals to a wider, faster data pathway.

PCI supports both 32-bit and 64-bit data width; therefore it is compatible with 486s and Pentiums. The bus data width is equal to the processor, for instance, a 32-bit processor would have a 32-bit PCI bus and operate at 33MHz.

PCI was used in developing Plug and Play (PnP).  All PCI cards support plug-and-play specifications. This means you plug a new card into the computer, power it on and it will “self-identify” and “self-specify” and start working without manual configuration using jumpers.

Unlike VESA, PCI supports bus mastering i.e. the bus has some processing capability and therefore the CPU spends less time processing data. Most PCI cards are designed for 5v, but there are also 3v and dual-voltage cards. Keying slots are used to differentiate 3v and 5v cards and slots to ensure that a 3v card is not slotted into a 5v socket and vice versa.

Computer Bus, PCI Slots
Three 32-bit PCI slots: I, Jonathan Zander [CC BY-SA 3.0 (http://creativecommons.org/licenses/by-sa/3.0/)]

The PCI Express Bus

The PCI Express bus comes in several versions (1X, 2X, 4X, 8X, 12X, 16X and 32X), which provide throughputs of between 250 Mb/s and 8 Gb/s, or close to 4 times the peak throughput of AGP 8X ports. Because its manufacturing cost is that similar to that of the AGP port, the PCI Express bus will progressively replace the former.

AGP (Accelerated Graphics Port) Computer Bus

The need for high-quality and very fast-performance of video on computers led to the development of the Accelerated Graphics Port (AGP). The AGP port is connected to the CPU and operates at the speed of the processor bus. This means that video information can be sent more quickly to the card for processing.

The AGP uses the main PC memory to hold 3D images. In effect, this gives the AGP video card an unlimited amount of video memory. To speed up the data transfer, Intel designed the port as a direct path to the PC’s main memory.

The data transfer rate ranges from 264 Mbps to 528mbpn, 800 Mbps up to 1.5 Gbps.

Accelerated Graphics Port
AGP (Accelerated Graphics Port)

PCMCIA (PC Card)

The Personal Computer Memory Card Industry Association was founded to provide a standard bus for laptop computers.

PCMCIA is an organization consisting of some 500 companies that have developed a standard for small, credit card-sized devices, called PC Cards. Originally it was designed for adding memory to portable computers. The PCMCIA standard has been expanded several times and is now suitable for many types of devices. There are three types of PCMCIA cards. All three have the same rectangular size (85.6 by 54 millimetres), but different widths.

  • Type I cards can be up to 3.3 mm thick and are used primarily for adding additional ROM or RAM to a computer.
  • Type II cards can be up to 5.5 mm thick. These cards are often used for modem and fax modem cards.
  • Type III cards can be up to 10.5 mm thick, which is sufficiently large for portable disk drives.

SCSI (Small Computer System Interface)

SCSI (sku´zē) is a parallel interface standard used by Apple Macintosh computers, PCs, and many UNIX systems for attaching peripheral devices to computers. Nearly all Apple Macintosh computers, excluding only the earliest Macs and the recent iMac, come with a SCSI port for attaching devices such as disk drives and printers.

SCSI interfaces provide faster data transmission rates (up to 80 megabytes per second) than standard serial and parallel ports. In addition, you can attach many devices to a single SCSI port, so that SCSI is an I/O bus rather than simply an interface.

USB (Universal Serial Bus)

This is among the latest addition to the computer bus collection. The universal serial bus connects external peripherals such as a mouse, keyboards, joysticks, printers, flash drives, scanners, and digital cameras to the computer. A single USB port can connect up to 127 peripheral devices. This computer bus also supports Plug-and-Play installation and hot plugging.

Various USB Data Transfer Rates

USB 1.0

  • A data rate of 1.5 Mbits per second (Mbps)

USB 2.0

  • High Speed
  • Throughput up to 35 MB per second (280 Mbit per second)
  • Support battery charging

USB 3.0

  • Very High Speed
  • 10 times faster than USB 2.0
  • Supports data rate up to 512 MB per second (4 Gbit per second)
  • Uses two unidirectional data paths one to receive and the other to transmit data

USB 3.1

  • USB 3.1 Gen 1 supports speeds of up to 5Gbit/s,
  • While USB 3.1 Gen 2 supports speeds of up to 10Gbit/s.
USB 3.1 Gen 1 Type-C Male to Type-A Male Cable

FireWire or IEEE 1394

This is a very fast external computer bus standard that supports data transfer rates of up to 400Mbps (in 1394a) and 800Mbps (in 1394b). Products supporting the 1394 standard go under different names, depending on the company.

Apple, which originally developed the technology, uses the trademarked name FireWire. Other companies use other names, such as i.link and Lynx, to describe their 1394 products.

A single 1394 port can connect up to 63 external devices. In addition to its high speed, 1394 also supports isochronous data – delivering data at a guaranteed rate. This makes it ideal for devices that need to transfer high levels of data in real time, such as video devices.

Although extremely fast and flexible, 1394 is also expensive. Like USB, 1394 supports both Plug-and-Play and hot plugging and also provides power to peripheral devices.

Computer Bus | What Is A Computer Bus ? | Computer Bus Types

How to Apply for a Birth Certificate in Kenya

This article outlines the process to apply for a birth certificate in Kenya. A birth certificate is a crucial document that every Kenyan citizen should have.

The national government immigration and registration of person’s main offices in Kenya are located in Bishop House, Upper Hill in Nairobi.

However, when you apply for a birth certificate in Kenya, you do not have to go to Bishop House. The registration process is accessed through the eCitizen portal. One can also apply from any Huduma centre or County Civil Registry offices.

A Birth Certificate provides proof that one is a Kenyan and similarly is required by pupils and students applying to sit for their National Examinations. It is also useful when applying for a National Identification Card when one turns 18. The document is also required when one is applying for a Kenyan Passport.

Log in to Apply for a Birth Certificate in Kenya
eCitizen Login

Birth Notification or Registration

As soon as a child is born, he/she has a right to a name, an identity and nationality for official identity and recognition. The child also has a right not to be vulnerable to theft/trafficking, arraignment in a court of law or to be subjected to child marriage.
To register a child, you need to fill birth notification form at the hospital where the birth took place or at a Chief’s office in cases of home birth.

Details Required in Birth Notification and Registration Include;

  1. Name of the newly born baby
  2. Date and place of birth
  3. Sex of the child
  4. Type of birth (single/multiple)
  5. Nature of birth (alive/dead)
  6. Name, age and marital status, previous births to, residential area and district of mother
  7. Name of the father (for married couples)
  8. Signature of the applicant
Birth Certificate Application
Birth Certificate Application Kenya

How to Apply for a Birth Certificate in Kenya

There are three scenarios that you can face when applying for a birth certificate in Kenya. They are applications for:

  • Child’s Current Birth Certificate
  • Adult Current Birth Certificate
  • Late Registration Of A Birth

Application for Child Current Birth Certificate

This application is for births where a notification was issued at the hospital. The application must be submitted in the parent/guardian account for applicants below 18 years.  The application should be submitted at least 30 days after the date of birth. This option is also used to replace lost birth certificates.

Procedure Applying Current Birth Certificate

  • Fill in the online application form
  • Upload all required documents
  • Pay for your application
  • Await feedback, once the certificate is ready, you will be notified via SMS.

Requirements

  1. A scanned copy of the birth notification
  2. Scanned copy of the National ID for applicants above 18 years
  3. Scanned copy of the parent’s ID
  4. For replacements, a scanned copy of the original birth certificate.

Worth Noting When Applying for a Birth Certificate

  • All attachments should be in PDF format.
  • All updates on the application will be communicated via SMS.
  • You will receive an SMS alert once the certificate is ready for collection.
  • The application should be submitted at least 30 days after the date of birth.

Application for Adult Current Birth Certificate

This application is for births which were registered within 6 months either by a Chief or in the hospital. This is a situation where the persons involved did not bother to apply for a birth certificate while the child was young.

Steps to Follow

  1. Fill in the online application form
  2. Upload all required documents
  3. Pay for your application
  4. Await feedback, once the certificate is ready, you will be notified via SMS.

Requirements

  1. A scanned copy of the birth notification
  2. You must have a scanned copy of the parent’s ID

Application for a Late Registration of a Birth

This type of application is for births that were registered after 6 months either by a Chief or in the hospital. This application should be submitted in the parent/guardian account for applicants below 18 years. This application must be completed after approval from CRS ACK Bishop’s gate offices.

Steps to follow

  1. Visit ACK Bishops Gate CRS office for approval
  2. Fill in the online application form
  3. Pay for your application
  4. Await feedback, once the certificate is ready, you will be notified via SMS.

Requirements

  1. A scanned copy of the birth notification
  2. Scanned copy of the National ID for applicants above 18 years
  3. A copy of the parent’s ID (scanned)
  4. For replacements, a scanned copy of the original birth certificate.

How to Replace Lost Birth for a Person Born In Nairobi

This is how you replace a lost birth certificate in Kenya. If you had applied for a birth certificate and it got lost or mutilated, you can apply for another one. This method can also be used to add a missing name.

This option is for people within Nairobi region. Those born outside Nairobi should visit Hass Plaza, 4th Floor at Lower Hill Road. Others born outside Nairobi should visit Civil Registry offices in their County for assistance.

Requirements for Replacing Lost Birth

  1. Birth certificate entry number.
  2. Scanned copy of the parent’s ID.
  3. Scanned copy of the original birth certificate.

How to Replace Lost Birth Certificate

  1. Log into ecitizen account and select civil registration services.
  2. Click on the make application link option.
  3. After reading the instructions, click on apply now.
  4. Select the replacement birth certificate option and click continue.
  5. Fill in all the details and make payment.
  6. Wait to be notified via SMS to go and collect your birth certificate.

A Note About Lost Birth Certificate

If you do not have a copy of the lost birth certificate, visit the ACK Bishop House located at Bishop’s Road off Ngong Road. They will give a reference or entry number that you will attach.

Final Thoughts on How to Apply For a Birth Certificate in Kenya

Thus, for any of the above birth certificate applications, you will require an eCitizen account. If do not have one, you can check here on how to create an eCitizen account. Decide the type of application you are supposed to make before clicking on it.

Proceed with the application process filling in the required information correctly. Upload the required documents in PDF format. Proceed and make payment before submitting your application.

Note that after payment, you just wait for your application to be processed. Once notified, it is the only time you will go for pick up.

How to Register a Business Name in Kenya

Register a Business Name in Kenya
Login into your eCitizen Account to Access the BRS Option

The information found in this article is the basics of how to register a Business Name in Kenya. A Business Name is the simplest form of business that an entrepreneur can operate.

The Business Name is not a legal entity. It simply refers to a person who owns the business and is personally responsible for its debts. Once you register a business name in Kenya, you will be issued a business registration certificate.

This certificate will be required in many areas when you are conducting day-to-day business. The process of registering a Limited Company is a bit different.

What You Need to Register a Business Name in Kenya

  • Your ID number.
  • An eCitizen account.
  • A passport photo.
  • Three or up to five proposed business names.
  • The person(s) registering the business name must specify the nature of the business in one line e.g Stationary, Food Stuff, Hardware.
  • The applicant must indicate the physical address of the business that is; plot number, Road and Town.
  • Indicate the postal code, address and town to be used by the business.
  • Indicate the proprietor(s) details: the name(s) should be in full as per the ID Number and all details must be filled in.
  • Download the system-generated form, sign and re-upload it. All partners/proprietors must sign on the downloaded form.
  • Registration fees amounting to Kshs. 950.

How to Register a Business Name in Kenya

  1. Log into your eCitizen account. You can learn how to create an eCitizen account here.
  2. Locate and click on the Business Registration Service link.
  3. Next to my applications option, click on make application.
  4. Click on the Business Name Registration link and proceed by clicking on the ‘Apply Now button.
  5. On the next page select the business type and enter your preferred business name. Describe the name you are searching although this is not a must.
  6. Fill in the rest of the information as specified below.
Business Name Registration
Business name registration on eCitizen

Proposed Names

Provide your proposed business names. The names should be provided in order of PRIORITY and the first three are mandatory. The first available name will automatically be assigned to the business. Click on save and continue.

Nature of Business

Select if you are the proprietor or lawyer of the business. Enter your address and postal code. Select the nature of the business. If you cannot find it among the list provided, select others. Note that relevant documents will be required for special cases for instance if you are starting a clinic. Normal business for sale or supply will not require any document.

Registered Address

In this section enter the primary address and building where the business is located. Provide as much information as you can. If you skip some crucial information, the business name will not be approved. You will be requested to make the necessary adjustments.

Ownership Information

Click on add proprietor to enter the required information. Type the ID number and the first name then click on verify. Fill in the rest of the information and also remember to upload your passport photo.

Click on submit to continue. If you are in partnership, after entering the first proprietor, click on the ‘Add Proprietor’ button to add the other partner. Once through, click on the save and continue button.

Upload Signed BN-2 Form

Application Documents

In this stage, download the BN 2 form and print it. After printing, sign and scan it before uploading it. Click on the submit and review option. Check if your application is okay and click on finish to make payment. Choose your payment method and pay Kenya shillings 850.

Final Part on How to Register a Business Name in Kenya

After following the above procedure to register a business name in Kenya, you wait for 2 to 3 days for the registration to be approved. If some details are not okay, you will be asked to amend them.

Click on the View button and click on download the business registration certificate.

In case your business is no longer in operation, remember to officially deregister the business.

How to File VAT Returns on iTax Portal

This is a complete guide on how to file VAT returns in Kenya. These returns are filed by individuals and companies that have a VAT obligation. The filing is done every month before or on the twentieth day of the month.

How to file VAT returns
Log into iTax Portal

What Is Value Added Tax?

Value Added Tax is charged on the supply of taxable goods or services made or provided in Kenya and on the importation of taxable goods or services into Kenya. The VAT rate is currently 16%.

Who Should Pay VAT?

If you are registered for VAT you will be required to account for VAT charged on your taxable supplies through online monthly returns and pay any VAT due.

This is achieved by the use of the KRA’s iTax portal.

It Is Important to Note That Tax Is Due and Payable When;

  • When goods or services are supplied to the purchaser.
  • An invoice is issued in respect of the supply.
  • Payment is received for all or part of the supply.
  • A certificate is issued by an architect, surveyor or any person acting as a consultant or in a supervisory capacity in respect of the service (whichever is earliest).
How to Download the VAT Excel File
Download the VAT Excel File

What Is the Penalty for Late Filing and Paying?

The deadline for filing is on the 20th of the following month. You can file VAT returns between the first and twentieth of every month.

Penalty on late filing: Whichever is higher between, Kshs. 10,000 and 5% of the tax due and an additional surcharge of 2% compounded per month or part thereof such unpaid tax.

Penalty on late payment: 5% of the tax due and a late payment interest of 1% per month on the unpaid tax until the tax is paid in full.

How to file VAT Return
Opening the Vat Excel File

How to File VAT Returns

  1. Log into the KRA iTax portal using your pin and password. If you have a problem logging in, you can learn how to reset your KRA pin password.
  2. Go to the returns menu and click on file returns.
  3. Select VAT as the tax obligation.
  4. Download the Excel Vat return form. You can use either of the first two options provided. These will require you to have Microsoft Office Excel 2010 or higher version installed on your computer. The ODS is for the Open System which rarely works.
  5. Go to your downloads folder and open the zipped Vat file. Open the Excel file. Accept the security notice. At the top where it is written ‘protected view’, click to open the file. Click on edit anyway to open the Excel file.
  6. Enable the macros at the top to access the file.
How to fill the Excel file
How to file VAT return

Step by Step Guide on How to File VAT Returns

Once your Vat monthly returns excel file opens, you will note that there are several worksheets. They are alphabetically labelled and with an added name. In most cases, you will only operate on four worksheets, Basic Info, General Rated Sales, General Rated Purchases and VAT Due.

To navigate, you can click on the arrow buttons in the bottom left-hand corner. Or you can simply click on the worksheet name and it will open.

A – Basic Info Worksheet

Fill in your KRA Pin, and select the original return type unless you are filing an amended one. The entity type is usually the head office. Enter the return period from and to. Well, this is the beginning and end of the month. Note we file for the previous month. Click next to continue.

The Validate button
The Validate button

B – General Rated Sales Worksheet

This is for recording the sales you have made. If your clients have pins, record them using the provided format and input each at a time. Use the add rows option to add more clients. You can also create a CVS file and use the import CVS option.

The other option is when you have no PINs for the clients. Indicate the total amount of taxable sale on where it is written “Total sales and Vat to customers not registered to Vat”. Then jump to sheet F but if you have zero-rated sales, record them on worksheet D.

How to file VAT returns
Select the Value Added Tax option

F – General Rated Purchases

This is in case you have made some taxable purchases. The type of purchase is either local or imported. You have to enter the details of each supplier individually. Remember once you enter the taxable amount, the Vat is calculated automatically. Remember to add rows if you want to add more records.

O – VAT Due

This section is the last one. It displays the amount of Vat to be paid at the bottom. If you had credit brought forward from the previous month, there is a provision for the same. Also, note there is an entry for withholding Vat credit. Once you are satisfied that everything is okay, click validate. A zipped file is created and stored on your computer.

How to File VAT Returns -Uploading the Zip File

Go to the browser, select the returns option and click on file return. Select VAT obligation and click next. The return period is filled automatically. Click on browse and locate your zipped file on your computer. In most cases, it is stored in the ‘My documents folder’.

Select the zip file and agree on the terms before submitting it. If your VAT amount was a credit, there is no further action required. However, if there is a VAT to be paid, it is advisable to make the payment there and then.

Generating a VAT Payment Slip

There are two ways you can generate a VAT payment slip. Immediately after your return is submitted, click on the link provided to make a payment. The liability details are displayed. Click on the add button, select the mode of payment and submit. Download the payment slip using the provided link.

For the other method, click on the payment tab and select payment registration. Click next to continue. Choose the tax head which should be VAT, tax subhead the same and payment type self-assessment. Select the liability and click on the add button. Select the mode of payment and submit. Download the payment slip. The payment can be made in any of the major banks or using Mpesa.

How to Generate a VAT Payment Slip

Checking VAT Credit

  1. Click on returns and select view filed returns.
  2. Click on consult. A list of all the returns you have filed is displayed.
  3. Click on view next to the last month you filled.
  4. Scroll at the bottom to see your VAT credit.

How to Check Withholding Credit

  1. Click on the certificates link.
  2. Then click on the reprint VAT withholding certificate.
  3. Enter the month and year then click on consult.
  4. Click on the certificate number to download.

Thank you for taking the time to go through this tutorial on how to file VAT returns. Please feel free to share and like this article. You can also add your comment below.

How to Apply for a Good Conduct Certificate in Kenya

How to Apply for a Good Conduct Certificate in Kenya
Police Clearance Certificate Application

This article will teach you how to apply for a Good Conduct Certificate in Kenya. This is a document issued by the DCI (Directorate of Criminal Investigations) indicating if one has a criminal record or not.

It is also known as a police clearance certificate. There are several instances you will require a good conduct certificate such as when applying for a job, applying for a PSV badge, and when vying for specific posts among others.

Upon completing the application and printing the necessary forms, you will present yourself to DCI headquarters or selected Huduma Center. The validity of a good conduct certificate is usually six months. However, some will ask for one that is less than six months old.

This article is for Kenyan citizens who wish to apply for a police clearance certificate. For foreigners, check this article on how to apply for Police Clearance Certificate for Foreigners.

Adult and Child Good Conduct Application Options

Requirements for Getting a Good Conduct Certificate in Kenya

  • An eCitizen account to facilitate online application. This is the same portal where you apply for Kenyan ePassport.
  • Your national identification document and a copy of the same.
  • Original birth certificate for persons under 18 years. Their good conduct application is processed through their parent’s account.
  • Around Kenya Shillings 1,100 on your Mpesa. The official fee is Kenya Shillings 1,050, the rest will cater for the transaction charges.
good-conduct-application
Good Conduct Application

How to Apply for Police Clearance Certificate in Kenya

  1. Log into your eCitizen account. If you do not have one, learn how to create an eCitizen account here. You cannot use someone’s account to apply.
  2. Look for Directorate of Criminal Investigations options and click on get service.
  3. Under the ‘our services’ option click on the ‘Police Clearance Certificate’ option.
  4. Select if you want police clearance for adults or a child under 18 years.
  5. Read through the instructions provided.
  6. Click on the next button.
  7. In the next stage, select the area and location where your fingerprints will be taken. Click on complete.
  8. Make payment via any of the provided methods. After you get a confirmation message on your phone, click on ‘complete’.
  9. Select the date and time you wish to avail yourself in the station you selected.
  10. Print the invoice and C24 form. The C24 form is printed on both sides of an A4 paper.
Apply for Good Conduct Certificate in Kenya
Apply for Good Conduct Certificate

During the Submission, You Need the Following:

  1. Download 1 copy of the invoice and one copy of the C24 printed on both sides of an A4 paper.
  2. The applicant in Person.
  3. Your Original ID card and its Photocopy or Birth Certificate & its copy for those under 18 years.
  4. The applicant must allow his or her fingerprints and palm prints to be recorded on the given fingerprint form C24.
  5. Visit the station you selected during the application.

Police Clearance Certificate Fees

Police Clearance CertificateKshs. 1,000
Convenience FeesKshs. 50
Total FeesKshs. 1,050
Police clearance certificate charges

How to Print Your Good Conduct

After applying and fingerprinting process, it will take some time for the Police Clearance to be ready. Once ready, you will be notified via message and it will be available on the eCitizen portal.

Log into your account and select the get service option in the Directorate of Criminal Investigations section. Under ‘recent applications’, click on the application link to open it.

On the left-hand side locate the downloads option and click on Police Clearance Certificate. Print your good conduct certificate.

Paying for Good Conduct Certificate Using Mpesa
Good Conduct Certificate Payment Process

How to Renew Your Good Conduct

At the moment, the renewal process of Good Conduct is the same as applying for a new one. Follow all the above procedures without skipping any. You will still go for fingerprinting afresh. Well, that is the simple guide on how to apply for a Good Conduct Certificate in Kenya.

Verified by MonsterInsights